
Installing ZEROXCLUB 12V DC hardweird wireless backup camera system in your vehicle can greatly improve your safety and convenience while driving. Whether you're a seasoned DIY enthusiast or a beginner, this guide will walk you through the step-by-step process of installing ZEROXCLUB wireless backup camera system.
What is a 12V DC Wireless Backup Camera System?
A 12V DC Hardwired Wireless Backup Camera System is a complete vehicle safety and monitoring solution designed primarily for cars, trucks, RVs, and trailers. The name describes its key features:
12V DC Hardwired: This means the system is designed to be powered by connecting it directly to your vehicle's 12-volt Direct Current (DC) electrical system (e.g., to the fuse box, ignition switch, or reverse light circuit). "Hardwired" implies a permanent, reliable power connection.
Wireless: The video signal is transmitted wirelessly via a 2.4GHz radio frequency from the camera to the monitor, eliminating the need to run a long video cable through the vehicle's body.
Backup Camera System: Its primary function is to provide a live video feed of the area behind your vehicle to aid in reversing and parking, significantly reducing blind spots.
Installation Video
Video1:Zeroxclub Backup Camera Review with Installation in a Ford F150
Video2: Installing ZEROXCLUB HD Wireless Backup Camera on a RV
Video3:Zeroxclub Backup Camera Review with Installation in a RV
Video4:Zeroxclub Wireless Backup Camera Review with Installation in a RV
Video5:Backup Camera Installation on the RV
video6: Installing backup Camera on Kubota RTV-X900.
Step 1: Before You Start
Tools Needed: Screwdriver set, drill & bits, wire stripper/cutter, electrical tape or heat shrink tubing, trim removal tools, multimeter (recommended).
Safety First: Disconnect the vehicle's negative battery terminal before working with electrical connections.
Pair the Devices (if not automatic): Test the system before installation. If the screen shows no image, enter the monitor's menu to search for the wireless camera signal. Refer to your user manual for the specific pairing process.
Step 2: Plan Your Setup
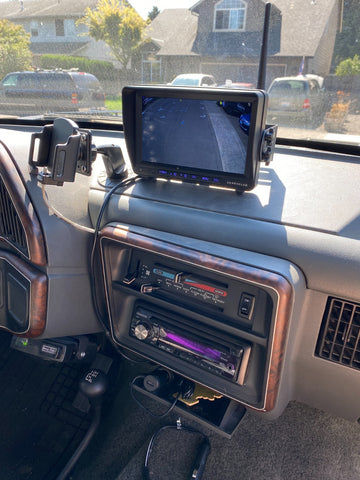
Monitor Location: Choose a spot on the dashboard or windshield with a clear view, minimal glare, and easy access to power (the fuse box is usually behind the dashboard).
Camera Location:
1.Typically mounted on the rear vehicle. Ensure it has a clear, unobstructed rear view.
2.Measure the distance from the power to roughly where you would like to place the camera. To determine the camera mounting position.(*the length of the power wire is 10ft)
Wire Routing Path: Plan how to run wires from the camera to the rear lights (for power). Common routes are under interior trim panels, along the headliner, or under the vehicle chassis (use conduit for under-vehicle routing).
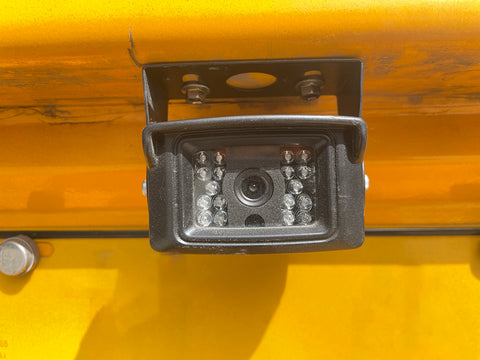
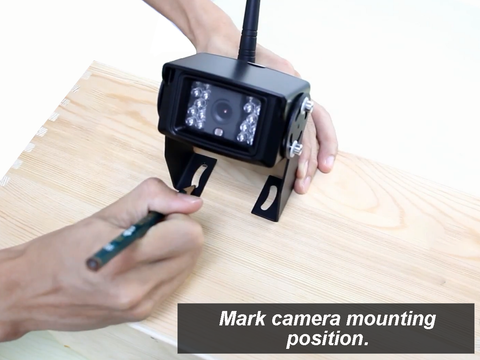
Step 3: Install the Rear Camera
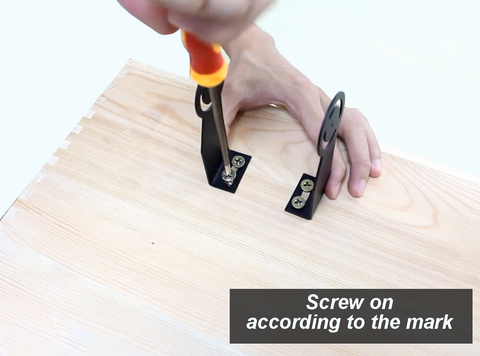
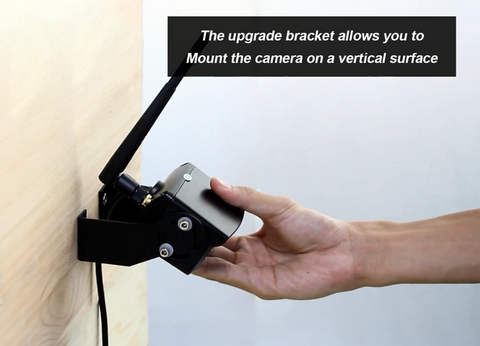
1. Mount the Camera: Secure the camera bracket at the chosen rear location using screws. Ensure it’s level.

2. Connect Camera Power:
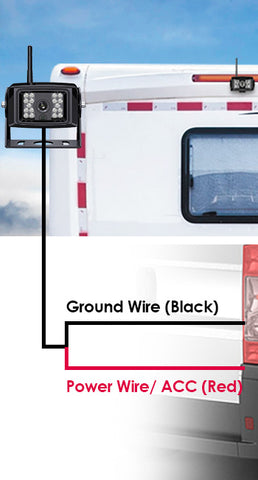
- Identify the Reverse Light Wire: Access the wiring for one of your vehicle's rear tail lights. Use a multimeter to find the wire that shows +12V only when the ignition is on AND the vehicle is in reverse gear. This is usually a red, or green/white wire(in the USA, the positive wire is usually white), but colors vary by vehicle. Verify with a multimeter.
- Make the Connection: Connect the camera's RED (power) wire to this reverse light wire. Connect the camera's BLACK (ground) wire to a clean, unpainted metal bolt or chassis ground point nearby.
- Secure & Protect: Use solder and heat shrink tubing or high-quality crimp connectors for a reliable connection. Wrap with electrical tape. Remove anything that overtly obstructs the camera’s view. Adjust the camera angle and ensures that the camera is securely attached.
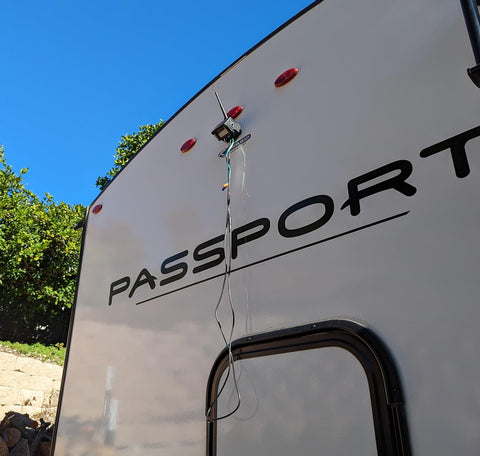
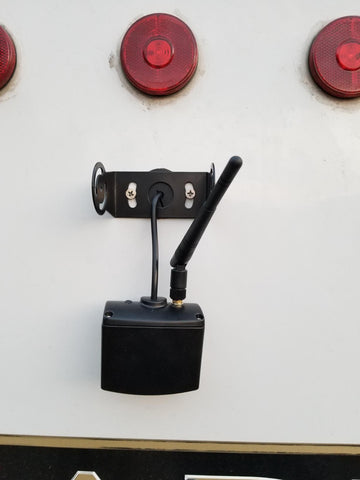
Video 6:ZEROXCLUB Wireless Side View Camera Installation on a RV
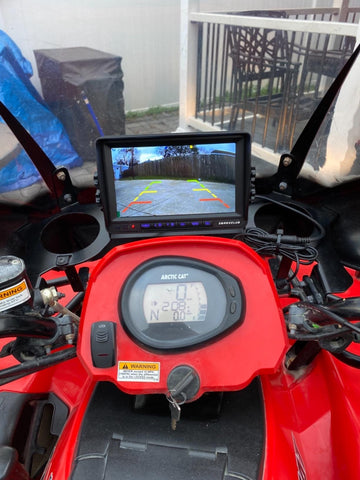
Step 4: Install the Monitor
Next, you'll need to install the monitor inside your vehicle. Choose a location that is easily visible to the driver and does not obstruct your view of the road. The most common locations for the monitor are on the dashboard or on the windshield. Use the user manul to securely mount the monitor, ensuring that it is stable and does not move while driving.

Step 5: Connect the Camera
Camera Wire: Neatly run the camera's power wire from the camera to the tail light connection point. Tuck it into the vehicle's existing wire loom or under trim panels. Use zip ties to secure it.
Note:It is recommended to consult the specific user manual provided by the manufacturer of your vehicle for going find the power location.
Note: Do not leave the ignition of the vehicle on when not testing.
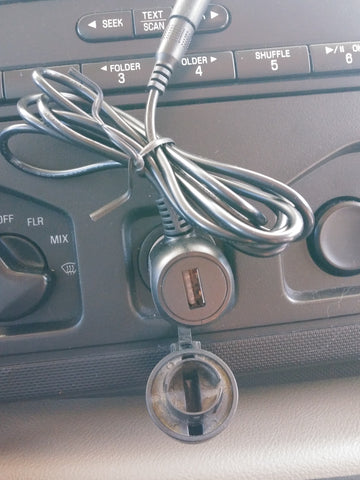
Step 6: Connect the Monitor
Use the supplied cigarette lighter plug, plug into cigarettes socket.
Step 7: Test the System
1. Reconnect the Battery.
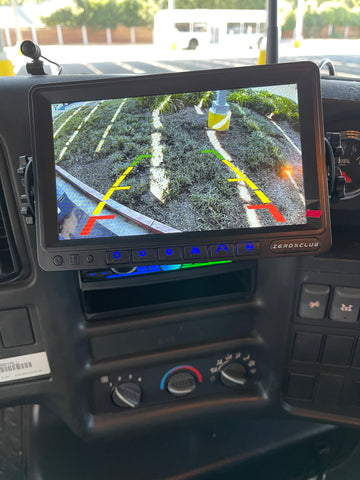
2. Initial Power-On: Turn the ignition to the ON position (or put the vehicle in reverse). The camera and monitor should power on automatically.
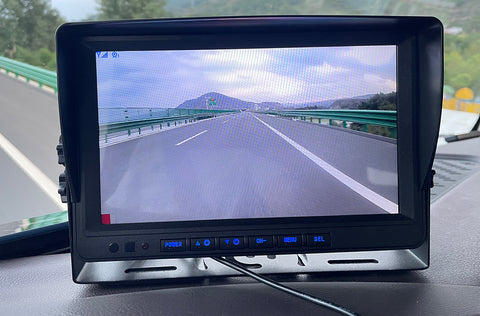
3. Check the image for a clear, correct angle. Adjust the camera if necessary.
4. Ensure all wires are secure and neatly tucked away.
Step 8: Enjoy the Benefits
Now that your wireless backup camera system is installed and working properly, you can enjoy the benefits of improved safety and convenience while driving. The camera will provide you with a clear view of the area behind your vehicle, making parking and reversing easier and safer.
Troubleshooting Tips
No Power: Double-check all connections and ground points.
No Video Signal: Ensure the camera is powered (check voltage at its connector). Ensure the monitor and camera are on the same channel and paired correctly. Reduce wireless interference by keeping the monitor away from other 12V adapters.
Poor Image Quality: Check the camera lens for obstructions or dirt. Ensure the video transmission is not being blocked by heavy metal structures.
Congratulations! Your hardwired wireless system is now installed, providing a reliable, automatic rear view whenever you shift into reverse.
Installing a wireless backup camera system may seem daunting at first, but by following these step-by-step instructions, you can successfully install the system yourself. With a little patience and the right tools, you'll be enjoying the benefits of a wireless backup camera system in no time.